


Hey there, fellow outdoor enthusiasts! Summer's here, and you know what that means: BBQs, picnics, and endless sunshine. But let's be real, those flimsy plastic picnic tables at the park just don't cut it, right? They're wobbly, they're ugly, and they scream "disposable."
Well, fear not! This summer, you can upgrade your picnic game with a DIY wooden folding table that's both beautiful and sturdy. It's perfect for backyard gatherings, park adventures, or even a cozy solo lunch in the sun.
And guess what? It's actually easier to build than you might think! Let me walk you through it, step by step, so you can feel like a true woodworking wizard by the time you're done.
Gather your supplies:
Lumber: We're talking 2x4s and 1x6s (or similar dimensions). You'll need enough to create the table's frame, legs, and tabletop. I went with cedar for its natural beauty and weather resistance, but you can choose whatever suits your style and budget.
Screws: Get a variety of sizes - 2-inch, 2.5-inch, and even 3-inch screws will come in handy.
Wood glue: This helps create a stronger bond between your pieces.
Finishing touches: Sandpaper (various grits), wood stain or paint (optional), and a sealant for protection against the elements.
Tools: A drill, screwdriver, saw (circular or handsaw), tape measure, pencil, level, clamps, safety glasses, and a dust mask.
Let's get this party started!
Step 1: Planning and Cutting
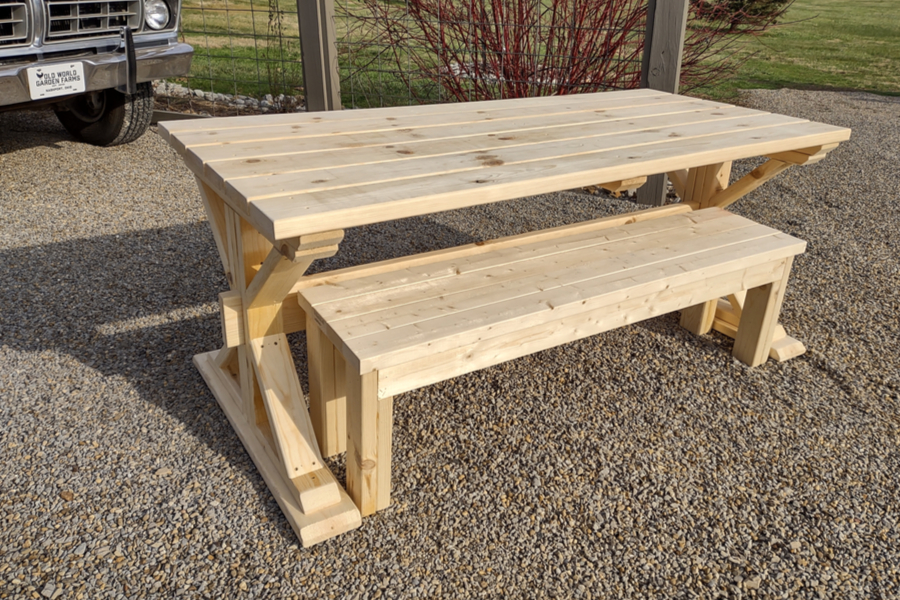
First things first, you need a blueprint. Don't worry, you don't have to be a professional architect to design a killer picnic table. I'm talking about a simple sketch with the dimensions of your table. I chose to make mine 48 inches long, 24 inches wide, and 28 inches tall. But hey, feel free to adjust those measurements to suit your needs and available lumber.
Once you have your plan, grab your trusty saw and lumber. Cut your 2x4s to create the frame for the table. You'll need two long pieces for the sides, two shorter pieces for the ends, and four pieces for the legs.
Step 2: Assembling the Frame
Time to get those screws out! Start by attaching the two side pieces to the two end pieces, creating a rectangular frame. You can pre-drill pilot holes for the screws to prevent splitting the wood, especially if you're working with hardwoods.
Step 3: Attaching the Legs
Now, let's add some legs! You'll want to attach them to the inside of the frame, close to the corners. Make sure they're positioned evenly and at a 90-degree angle.
Step 4: Creating the Tabletop
Here's where we get to work on that beautiful tabletop. Cut your 1x6s to the desired length for your table (in my case, 48 inches). You might need to glue and screw together multiple boards to achieve the desired width (24 inches in my case).
Step 5: Joining the Tabletop to the Frame
Once your tabletop is assembled and sanded smooth, you can attach it to the frame. I prefer using wood glue and screws here for extra strength. Place the tabletop directly on top of the frame and secure it using screws from underneath.
Step 6: The Folding Mechanism
Okay, this is the cool part. The folding mechanism is what makes this picnic table a champion of space-saving. To create this, you'll use hinges. You can choose standard hinges or piano hinges, depending on your desired level of sturdiness.
Attach the hinges to the underside of the tabletop, about 8 inches from each end. Then, attach the hinges to the frame, ensuring that the tabletop folds smoothly and securely.
Step 7: Sanding and Finishing Touches
Now, give your table a good sanding to smooth out any rough edges or splinters. You can start with a coarse-grit sandpaper and gradually move to a finer grit for a super smooth finish.
Once you're happy with the sanding, it's time to unleash your creativity! You can stain, paint, or even leave the wood in its natural state. I chose to go with a natural wood stain to enhance the beauty of the cedar. Finally, add a protective sealant to protect your table from the elements.
And you're done!
There you have it, folks. A DIY wooden folding picnic table that's ready to conquer any summer adventure. Not only will you have a beautiful and functional piece of furniture, but you'll also have the pride of knowing you built it yourself. Plus, you'll save a ton of money compared to buying a similar table at a store.
Bonus Tips:
Don't be afraid to experiment! You can add a built-in cooler compartment, storage shelves, or even a built-in umbrella holder to make your table even more versatile.
Think about your storage options. You can create a simple stand to store your table when not in use or even design a carrying case for easy transportation.
Most importantly, enjoy the process! This project is a great opportunity to learn new skills and unleash your inner craftsman.
So go on, grab your tools and lumber, and let's build some amazing picnic tables together! Happy building and happy summer!

0 comments:
Post a Comment
Note: Only a member of this blog may post a comment.